Bonsai Demonstration
This sequence of photographs documents the transition of a fine tree from
a growing pot into a bonsai pot. The pruning and wiring were done in
one day, and the repotting was performed the following weekend (January 6, 1996).
This San Jose juniper was purchased from a bonsai nursereyman about three years
ago for $20 US. It was in a 5-gallon plastic container and was initially trained
and put into a large wooden growing container. A year and a half later it was repotted
into this California terra cotta low growing pot and pruned and wired again. Now it
is ready to be put into a bonsai pot.
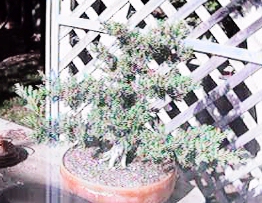
Here is a front view of the tree. The branches must first be pruned.
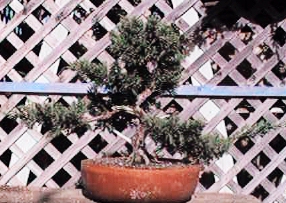
This is the tree after pruning.
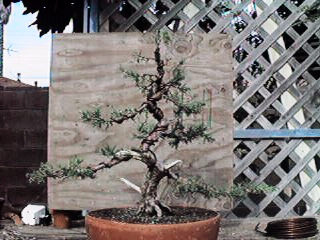
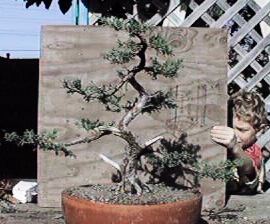
This is the tree after wiring. Heavy wire has been wrapped around all of the
primary branches and some of the secondary branches have also been wired. The
wires should never cross. It is easy to prove that any tree can be fully wired
(including the trunk) without crossing any wires.
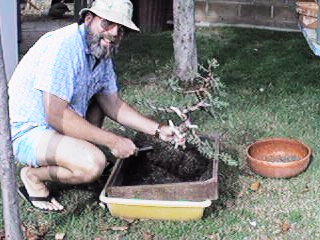
Next the tree is removed from its growing pot and prepared for potting into a
smaller bonsai pot.
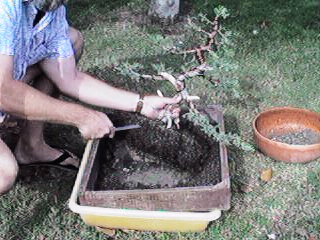
A root rake is used to remove soil from the roots. The roots will be pruned so
that it will fit into the small bonsai pot.
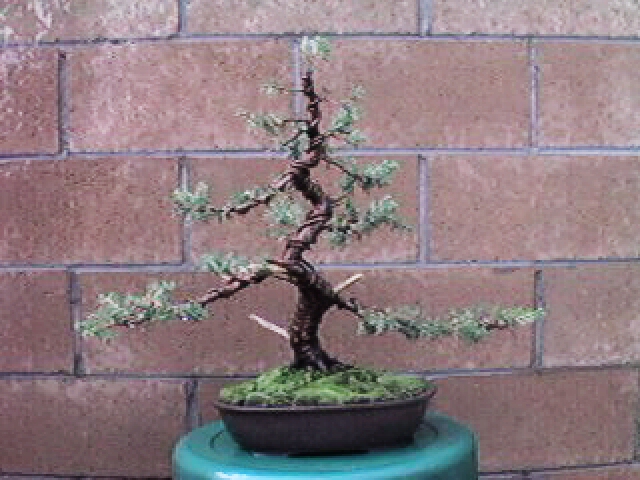
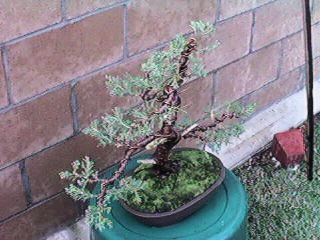
The finished bonsai. Moss has been placed over the potting soil to retain moisture
and prevent erosion.
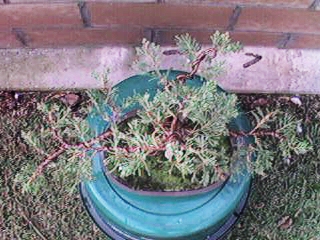
This top viw of the finished bonsai shows the tree placement in the pot and the branch
arrangement.
In about six months the heavy wire will be removed, the tree will be pruned again,
and the secondary and tertiary branches will be wired out. It will be ready for a
bonsai show in three to five years.
 Richard dot J dot Wagner at gmail dot com
 USC home
page.
USC home
page.
bdemo.html; This hand crafted HTML file was created January 7, 1996. Last updated April 9, 2010.